top of page


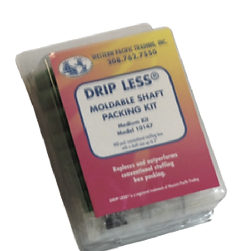
DRIPLESS MOLDABLE PACKING KITs
Eliminate water in the Bilge.
Use our Formula to ensure your boat is suited for this product.
Anchor 1
Ensure this product works for you...
The drip less moldable packing kit may not be suitable for all boats, especially those with very high speed shafts. To make sure your boat is compatible with the drip less moldable kit, run the following formula to make sure this kit will work properly in your boat:
Formula:
Shaft size times three (3), that number times the shaft (not engine)rpms, divided by 12. If the number is less then 900 the kit is compatible with your boat. If the answer is over 900 then your boat is outside the envelope of performance for the drip less moldable kit and it should not be used in that vessel.
Example:
1” shaft times 3= 3 times 1500 shaft rpms=4500 divided by 12=375 which is well below the limit of 900.
Dripless Moldables: Instructions
Shaft packing is a very unique product. This is the most practical way to eliminate water leaking into your stuffing box or leaking rudder stuffing boxes. The beauty of this product is that you can install it in your current stuffing box the same way you install replacement packing. The drip less moldable packing kit consists of the moldable packing in the form of sticks of material. This material is similar to a clay material and as a result it is necessary to install retainers to hold the moldable packing in place. You may use any standard square braid packing similar to the ones mentioned above, to act as a retainer for the moldable material. Here is a summary of the installation of the drip less moldable packing kit.
Step 1
Cut two (2) lengths of standard shaft packing (suggest you use gtu) and coat them with the paste that is in the kit. Use all the paste and give each length of packing a heavy coat of the paste.
Step 2
Take one (1) of the pieces of packing and insert it into the head of the Stuffing box.
Step 3
Take the green moldable packing and stuff it into the stuffing box next to the first piece of square braid packing you just installed.try and fill the stuffing box cavity with the moldable material.you may only use a few sticks of the moldable material. That is ok, as some stuffing boxes will take more moldable material and some less.
Step 4
Once you have the stuffing box cavity filled with the moldable material, take the second piece of square braid packing and fit it around the end of the shaft. When you complete this part you should have a ring of square braid packing, a quantity of moldable drip less packing and a second ring of square braid packing on the end. The idea is to use the square braid packing to hold or retain the moldable material in place.
Step 5
Hand tighten the stuffing box nut. By doing this you push the air voids out of the moldable material which creates a seal within the stuffing box. This seal is what keeps the water out of your stuffing box. Do not tighen the stuffing box nut at this time, simply hand tighten.
Step 6
Secure the boat in a slip, start the engine at idle, engage the transmission at idle and allow it to run for about ten (10) minutes. This will bring the stuffing box up to operating temperature. Adjust the stuffing box nut 1/8 of a turn and monitor the drip. Once the drip stops, leave the nut at that setting. Now you have adjusted the tension for the operational condition of the stuffing box. Remember the stuffing box expands as it heats up and that is why doing the final adjustment at the expanded state is so important. Your stuffing box will operate at a higher temperature as you no longer have water flowing through it to cool it down. This is not a problem as long as the temperature does not exceed 140f. If you can touch the stuffing box with your hand, even if you cannot leave it there, that temperature is ok. To check the temperature you can use a simple cooking thermometer or one of the more high tech thermal sensors.

Frequently Asked Questions
Common Problems
bottom of page